

Build an agent
Building an agent is an admin job in the Agents library. You give the agent a goal and break the work into tasks. You pick which actions it may run and where it must pause for approval. You also choose which space types can run it. Nothing runs from here. An agent is a reusable definition that people start inside a space (see Run an agent).
The library and editor are admin-only. Non-admins see “You need an admin role to manage agents.”
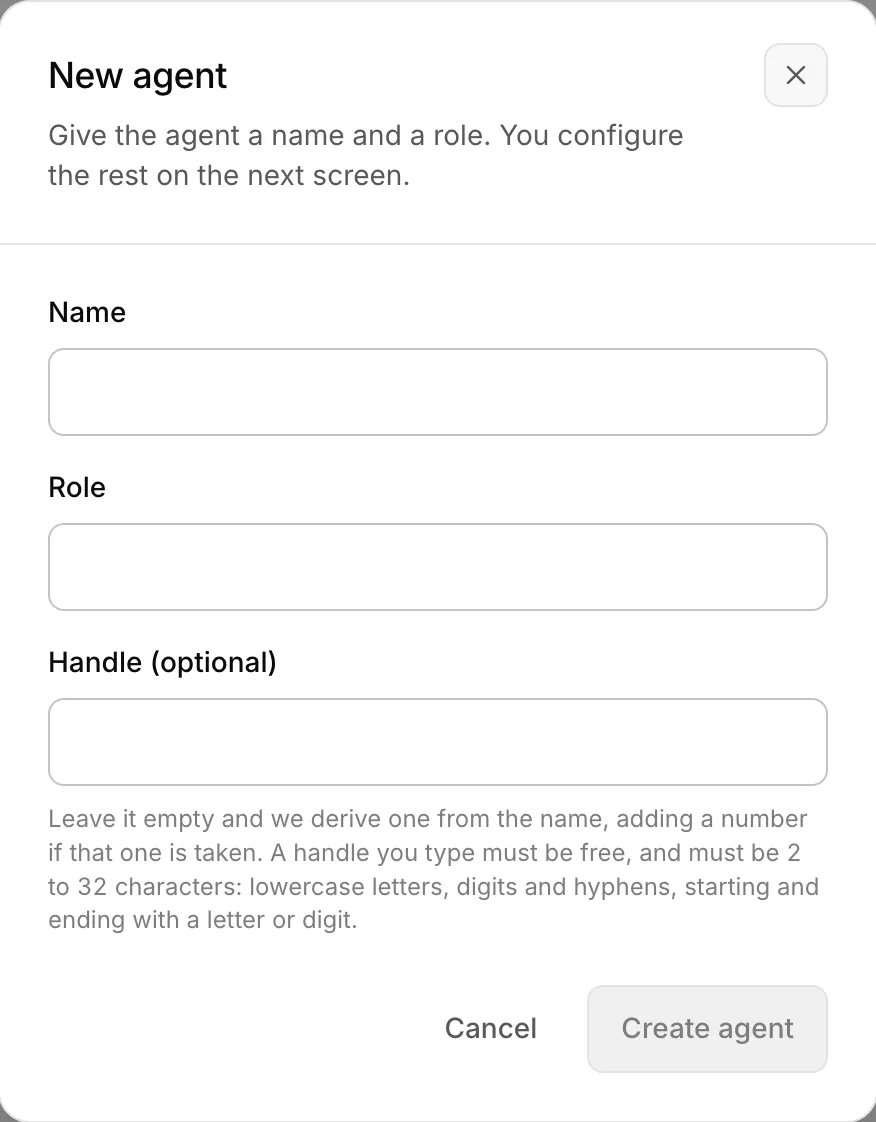
Create a draft
From Agents, click New agent. Give it a Name and a Role. The Handle is optional. If you leave it empty, CloudRaker derives one from the name. This creates a draft and opens it in the editor. Fill in the rest there.
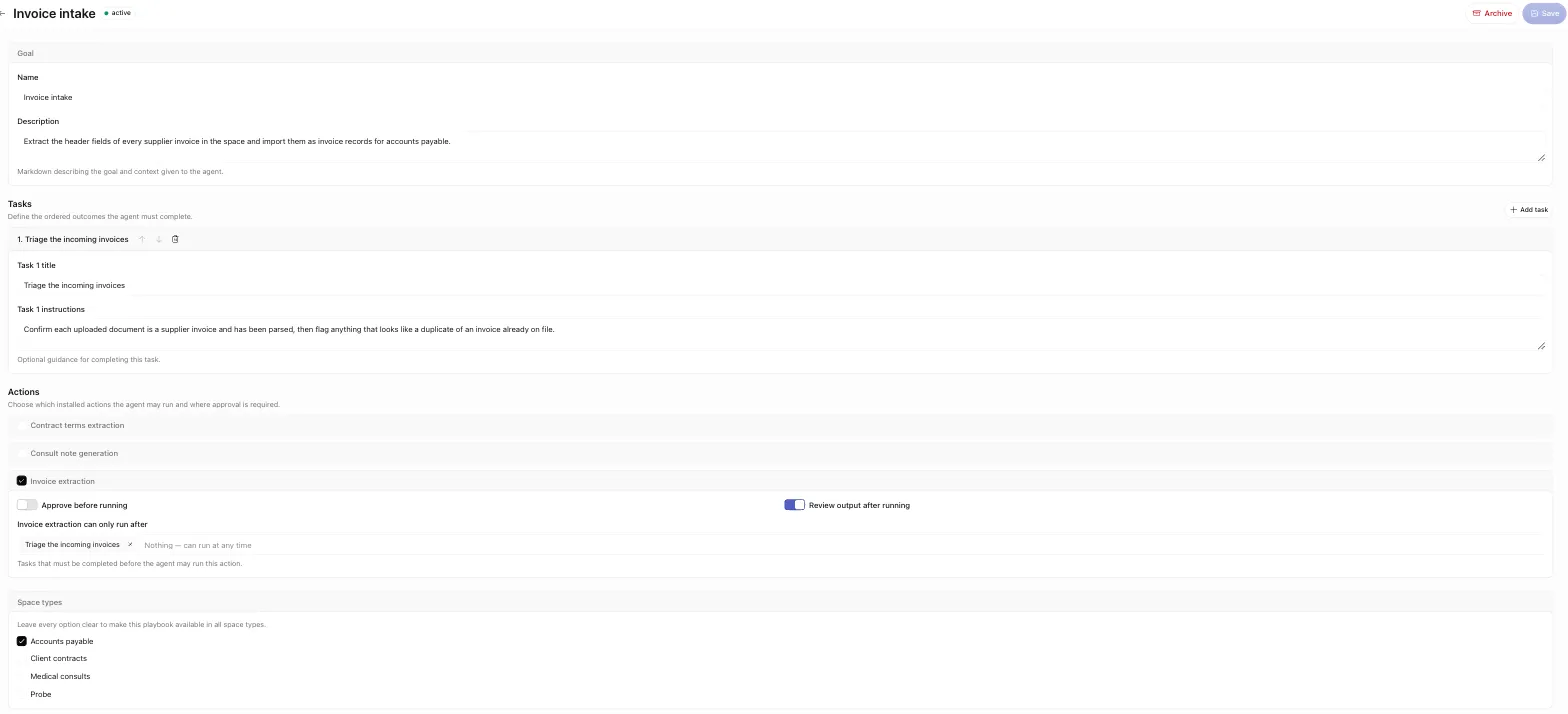
The editor
The header shows the agent name and its status badge, plus three buttons:
- Activate — appears only for a draft. It is disabled while unsaved changes exist or the agent is invalid. A valid agent has a name and a title on every task. Activation runs a server-side check. If anything fails, the editor shows a bulleted list of issues to fix.
- Save — saves your changes.
- Archive — retires the agent. It is hidden once the agent is archived.
The body of the editor has four sections, top to bottom.
Goal
A Name and a Description. The description is the agent’s brief. It is Markdown that describes the goal and context given to the agent. Write it as you would brief a capable teammate: state the objective and anything the agent needs to know.
Tasks
The ordered outcomes the agent must complete (up to 30). Add one with Add task. Each task has:
- Title (required) — the outcome, in a few words.
- Instructions (optional) — extra guidance for completing it.
- blocked by — a dependency picker. A task can be set to start only after other tasks finish. Only upstream tasks are offered. A task cannot depend on itself or on a task that runs later. Leave it as “Nothing — can start right away” for tasks that are ready from the start.
You can reorder and remove tasks as you build.
Actions
Check which of your installed actions the agent may run. For each action you turn on, you control where it pauses:
- Approve before running — a pre-approval gate. The run pauses and shows what the agent proposes before it dispatches the action.
- Review output after running — a post-approval gate. The run pauses so you can review the action’s output before it commits.
- can only run after — task gates. Choose the tasks that must complete before the agent may run this action.
See Approvals and steering for how these gates behave during a run.
Space types
Checkboxes for the space types that may run this agent. Leave every option clear to make the agent available in all space types.
User-triggered actions
Some actions are user-triggered. The agent cannot run them on its own because they need you. An example is a browser-fill action that fills a form in your own browser. In the Actions section these show a User-triggered badge and no approval toggles. You start that step yourself from the run page. The agent fills the form and you submit it. Approval gates do not apply. See Run an agent for how the step works during a run.
Activate it
When the agent is valid and saved, click Activate. Its status becomes active. It then appears in the run picker for every space type it is bound to, or all space types if you left them clear. Only active agents can run.
Activation is gated on validity. The agent needs a name and every task needs a title. It must also pass the server check. If activation fails, fix the listed issues and try again.