

Fill and sign documents
Two first-party actions produce finished documents. Fill form fills a fillable PDF from your documents. Sign sends a document for e-signature. Configure both from the Document generation entry points in the sidebar. They run like any other action (see Run an action).
Fill form
Set up the template
Open Document generation → Fill form and configure the action:
Choose a form template
Use the document picker to select a fillable PDF. Pick from the space’s files or your organization’s templates.
Inspect the template
Click “Inspect template” to detect the fillable fields and read their labels (“Analyzing template — detecting fields and reading labels. This can take a minute the first time.”). If the PDF has no fillable fields, CloudRaker can generate them (“This form had no fillable fields; {n} were detected. The names are machine-generated — labels matter.”).
If you pick a PDF that is not a form, inspection reports: “This PDF has no fillable form fields — pick a fillable form, not a plain document.” Choose a fillable form.
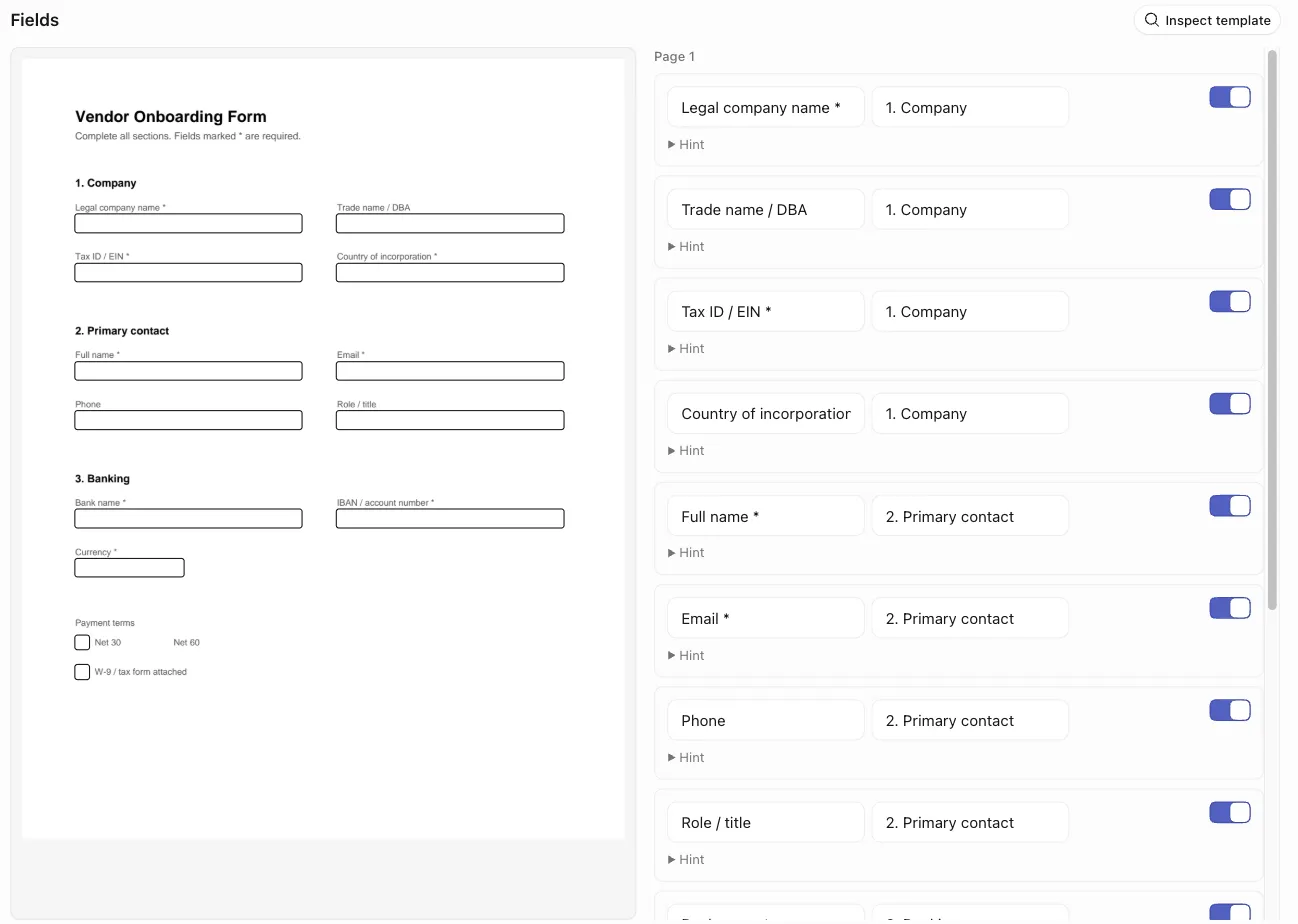
Fill and review at run time
When you run the action, the AI assistant drafts values for the included fields from the run’s documents. It then pauses for your review. The run page shows “Review form values” (“The values below were drafted from your documents. Edit anything, then produce.”). Correct any wrong value, then click “Produce document.”
The produced document is flattened and locked. You cannot edit it as a form afterwards. Review the values carefully before you produce the document.
Sign
Set up signers and placement
Open Document generation → Sign and configure the action. Set two things:
- Signers. Standing signers are added to every run. Per-run signers are chosen when you launch the run (“Standing signers are added to every Sign run. Per-run signers are chosen when you launch the run.”).
- Placement. Signatures go on a signature certificate page or on tagged placements. For tagged placements, the PDF must contain
[Signature 1],[Signature 2], … placeholders, one per signer in order. A run fails if its PDF is missing a placeholder.
Track the envelope
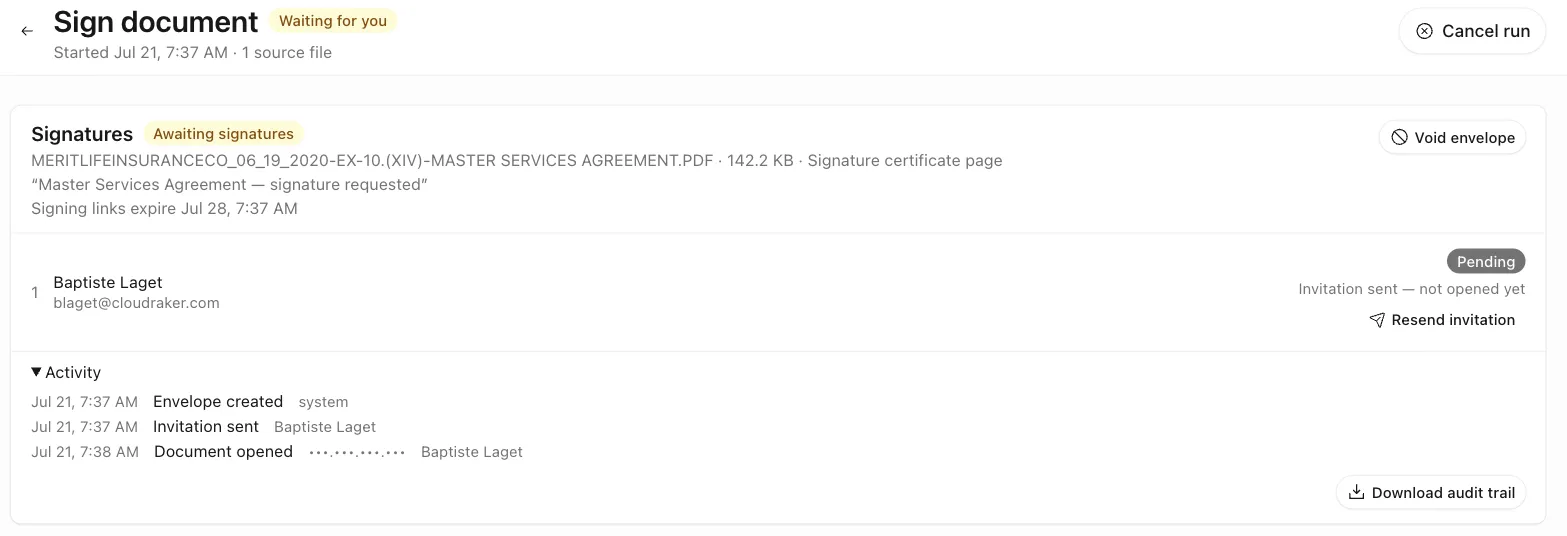
A Sign run’s page shows the “Signatures” envelope panel instead of the generic sections. It shows:
- Document details — name, size, and mode (“Signature certificate page” or “Tagged placements”).
- Envelope status — “Awaiting signatures”, “Sealing document”, “Signed”, “Failed”, or “Voided”.
- The signer roster — each signer with a per-signer status (“Pending” / “Signed”) and a “Standing signer” badge where it applies. Each signer also shows a sub-status such as “Signed
{date}”, “Email verified{date}”, or “Invitation sent — not opened yet.” - “Resend invitation” — sends a new signing link. The signer’s previous link stops working.
- “Activity” — a collapsible timeline: Envelope created → Invitation sent → Document opened → Verification code requested → Email verified → Signed → Envelope completed.
- “Void envelope” — available while signatures are pending. Every signing link stops working immediately, and the run is marked failed.
- “Download signed document” and “Download audit trail” — available when the envelope is complete.
An expiry line shows when the signing links stop working (“Signing links expire {date}.”).
The signer’s experience
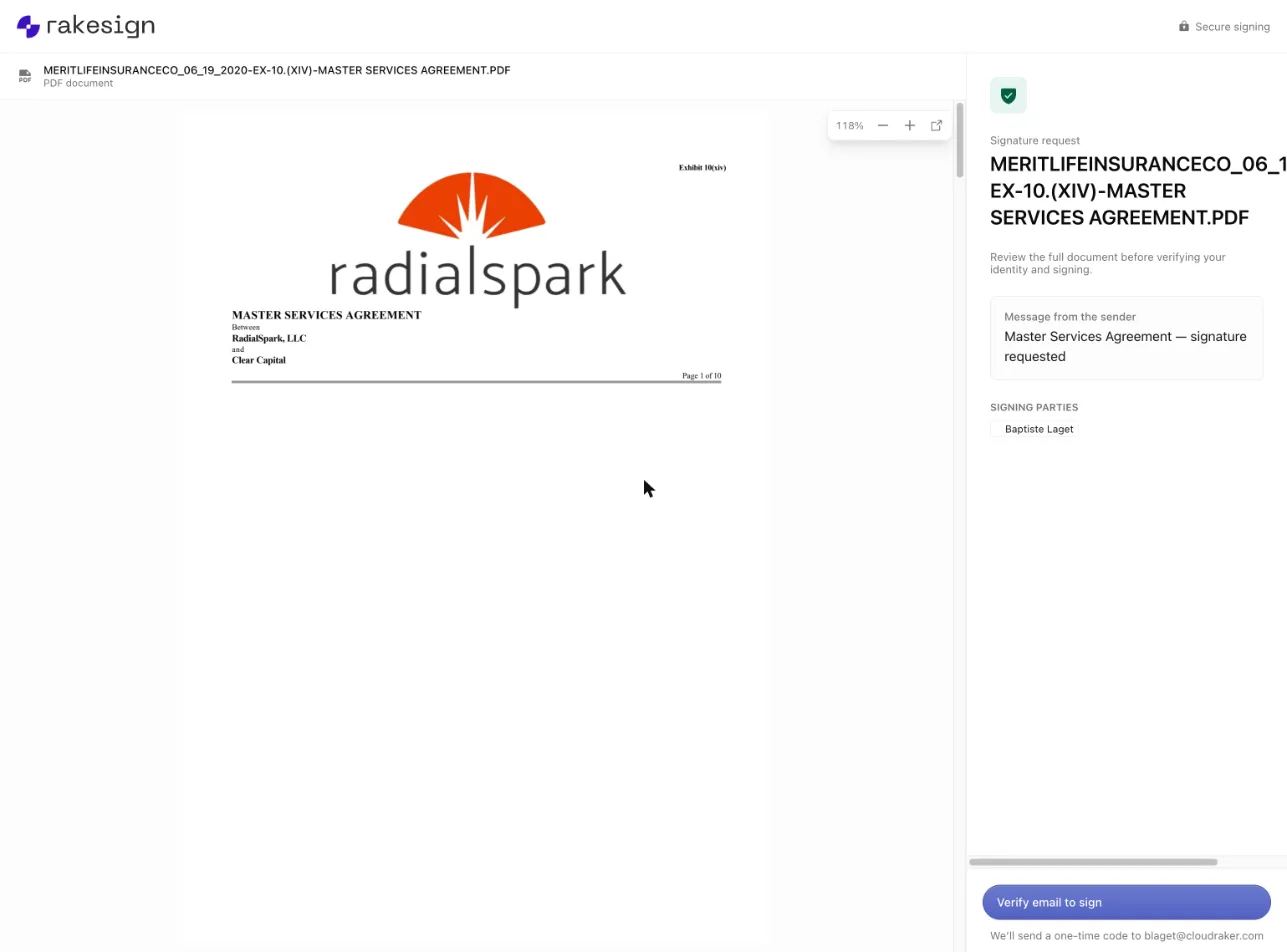
Signing occurs outside this app. Each signer receives an email invitation and signs on an externally hosted signing page. The signer verifies their email with a one-time code, then signs. CloudRaker is the sender’s side only. It tracks the envelope but never shows signer signing links. To document or support the signer flow, work from the invitation email, not from the app.
Redaction actions
The redact PDF and redact audio actions run like any other action from a space’s Actions tab. The redacted file appears under Generated files on the run page. These actions have no dedicated review UI. See Run an action.